Door & Hinges
Adjustment Procedures
Step-by-step sliding door and rear cargo door adjustment guide for 2002–2006 T1N Sprinter vans with torque specs and diagrams.
±0.02 in tolerance
Top gap: 0.51" ±0.02"
Main fastener torque
Stabilizer receiver torque
When Do Doors Need Adjustment?
Sliding Door Symptoms
- Door is hard to open or close
- Visible gap unevenness along B or C pillar
- Door doesn't latch securely
- Wind noise or water leaks at the seal
- Door "jumps" or binds in the track
Rear Door Symptoms
- Door doesn't close flush with body
- Uneven perimeter gap (too tight or too wide)
- Difficulty latching one or both doors
- Hinge sag causing the door to drop
- Seal compression is uneven
Tools You'll Need
- Torque wrench (calibrated)
- Socket set (10mm, 13mm, T40 Torx)
- Feeler gauge or ruler for gap measurement
- White lithium grease for rollers/track
- Touch-up paint and primer
Sliding Door Adjustment
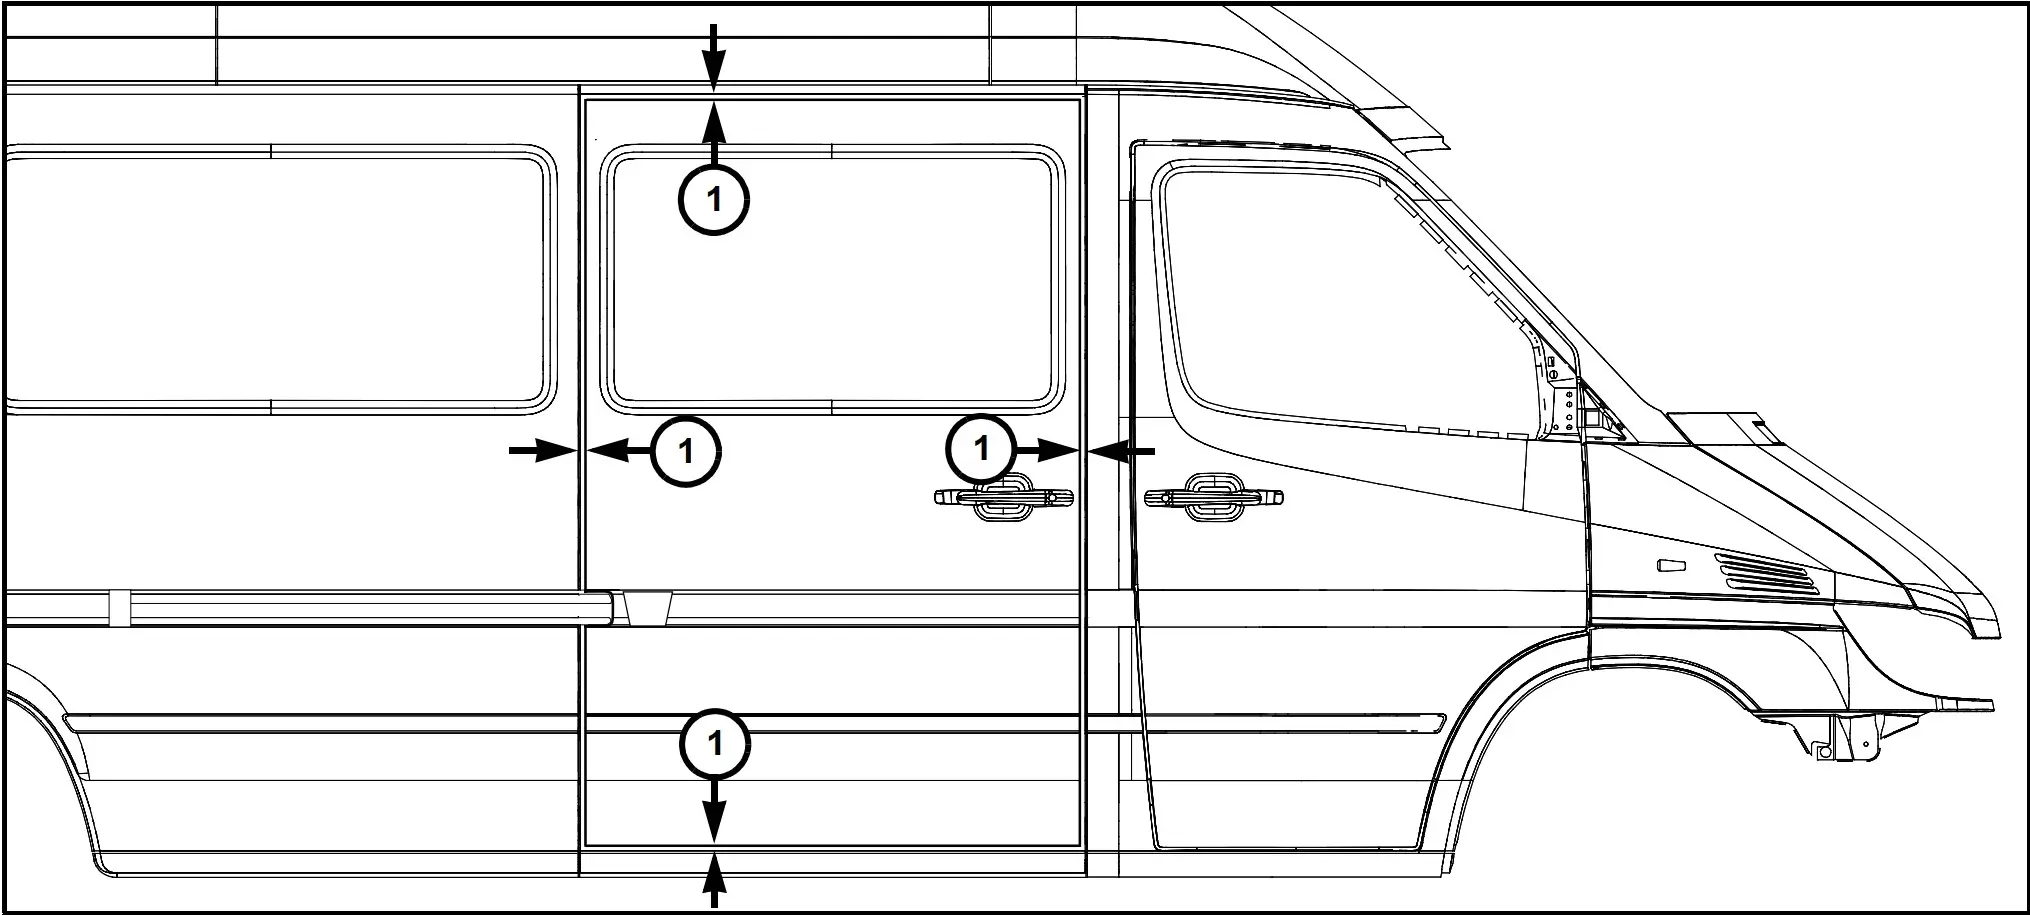
Target gap: 0.28" ±0.02" (7 mm ±0.5). Door surface must be flush with B and C pillars.
Check door gap (0.28" ±0.02")
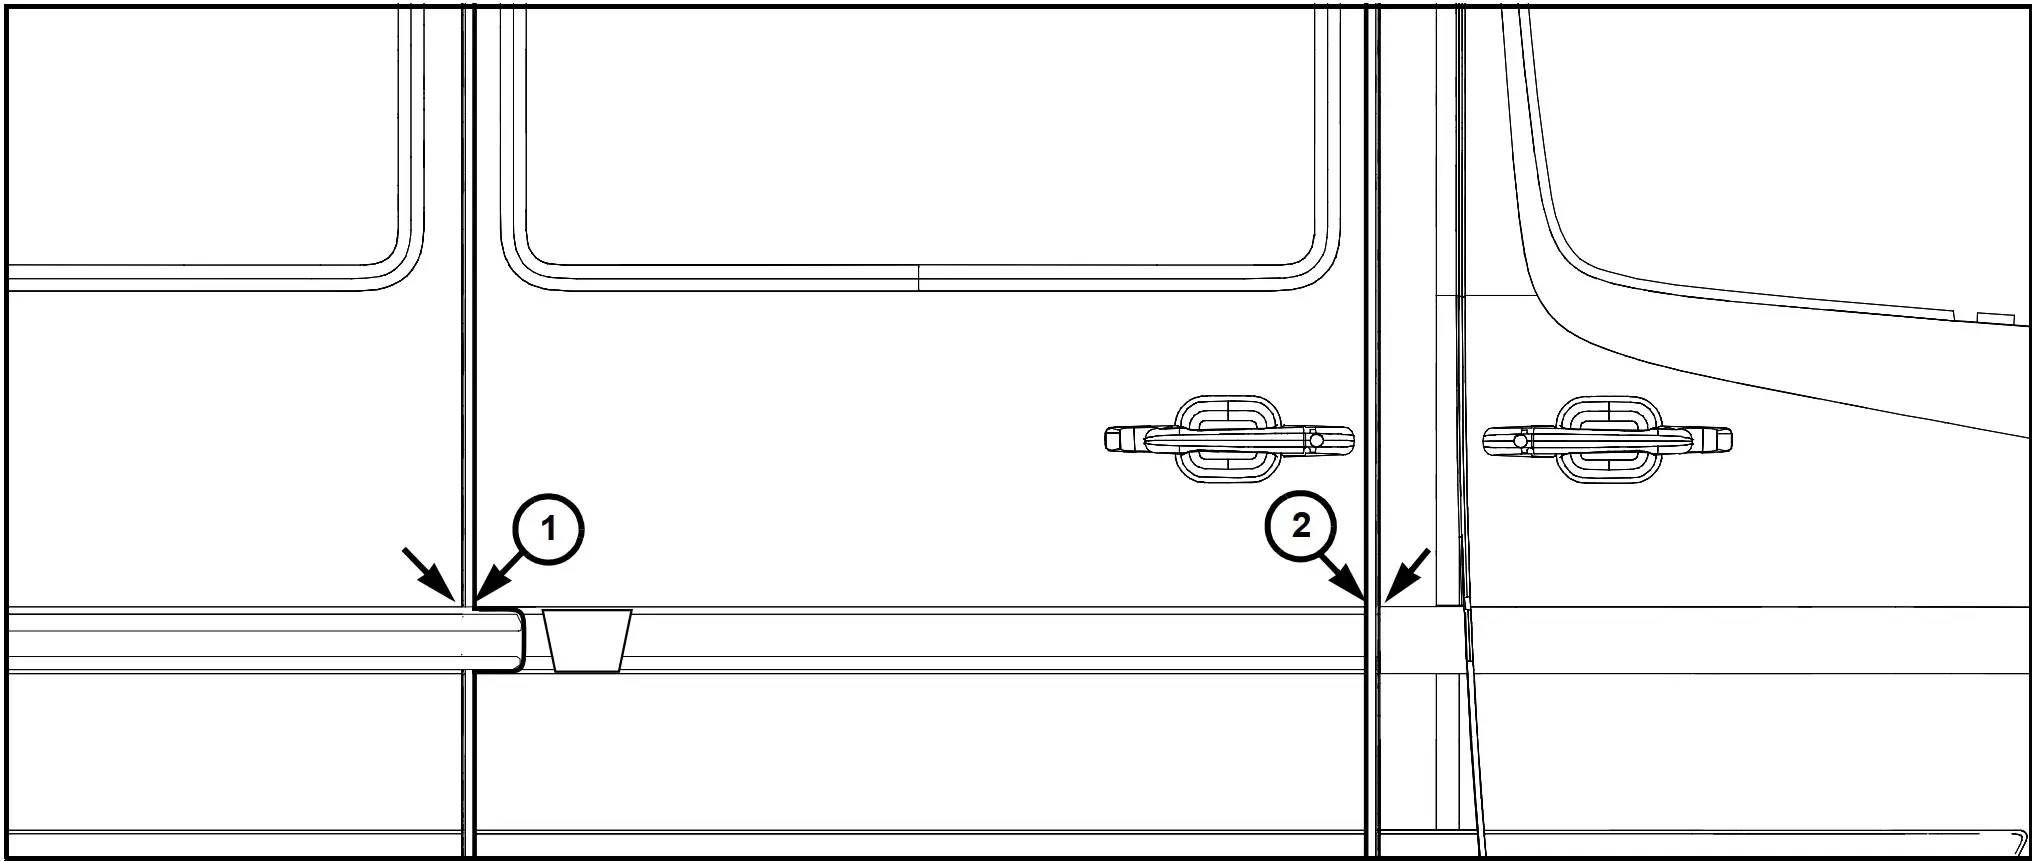
Measure the gap between the sliding door and body at multiple points along the B and C pillars. The gap should be uniform.
Verify ridge flushness at B and C pillars
The door surface must be flush with the adjacent body panels. Check both top and bottom edges.
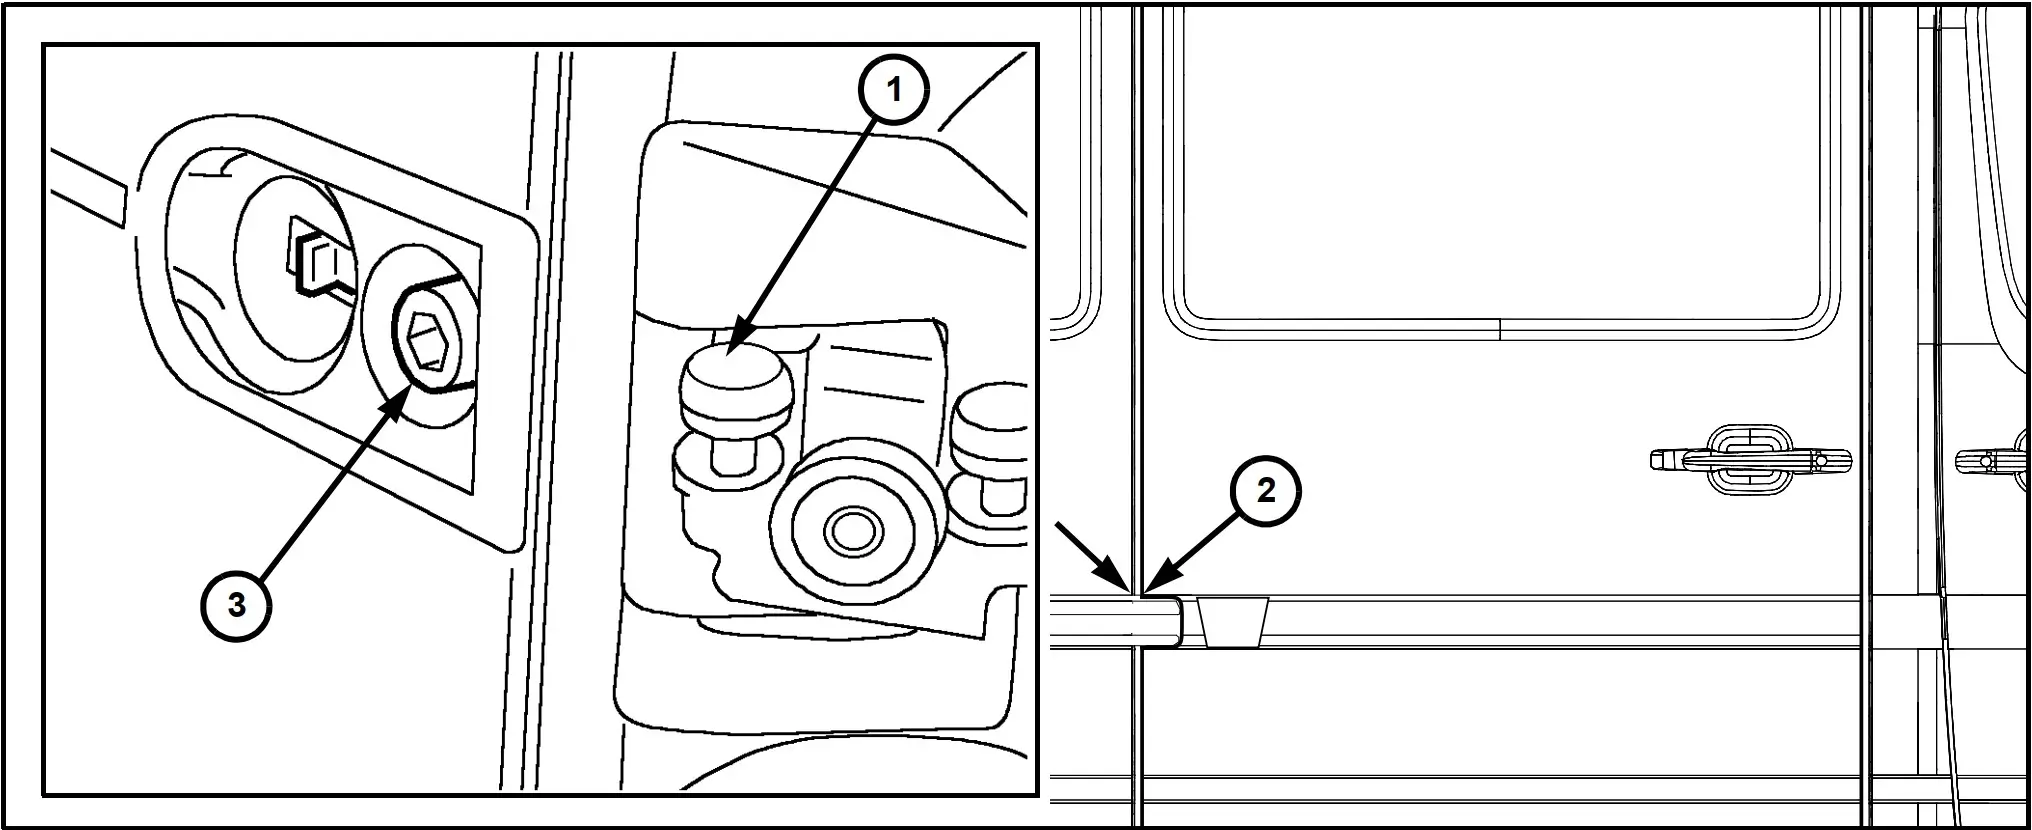
Tighten stabilizer receiver to 7.4 ft·lbs
The stabilizer prevents door rattle and controls the closing action. Torque carefully to avoid stripping.
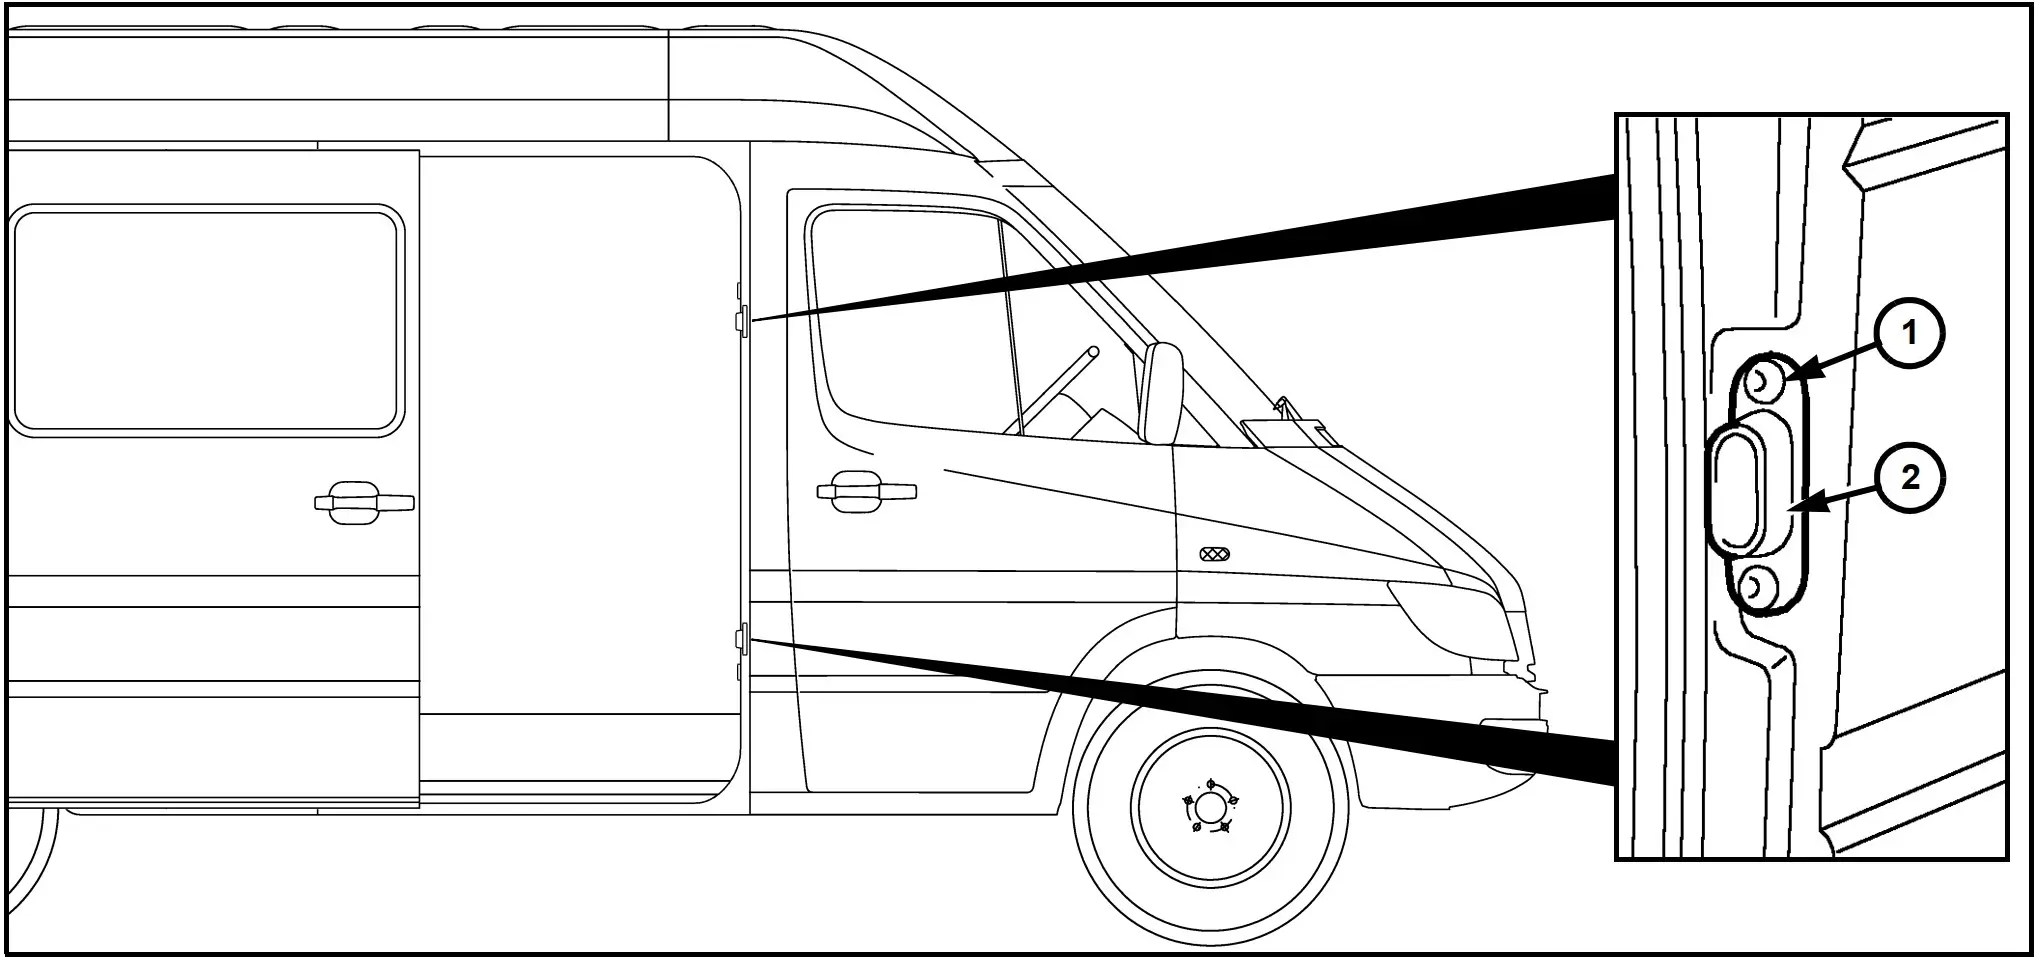
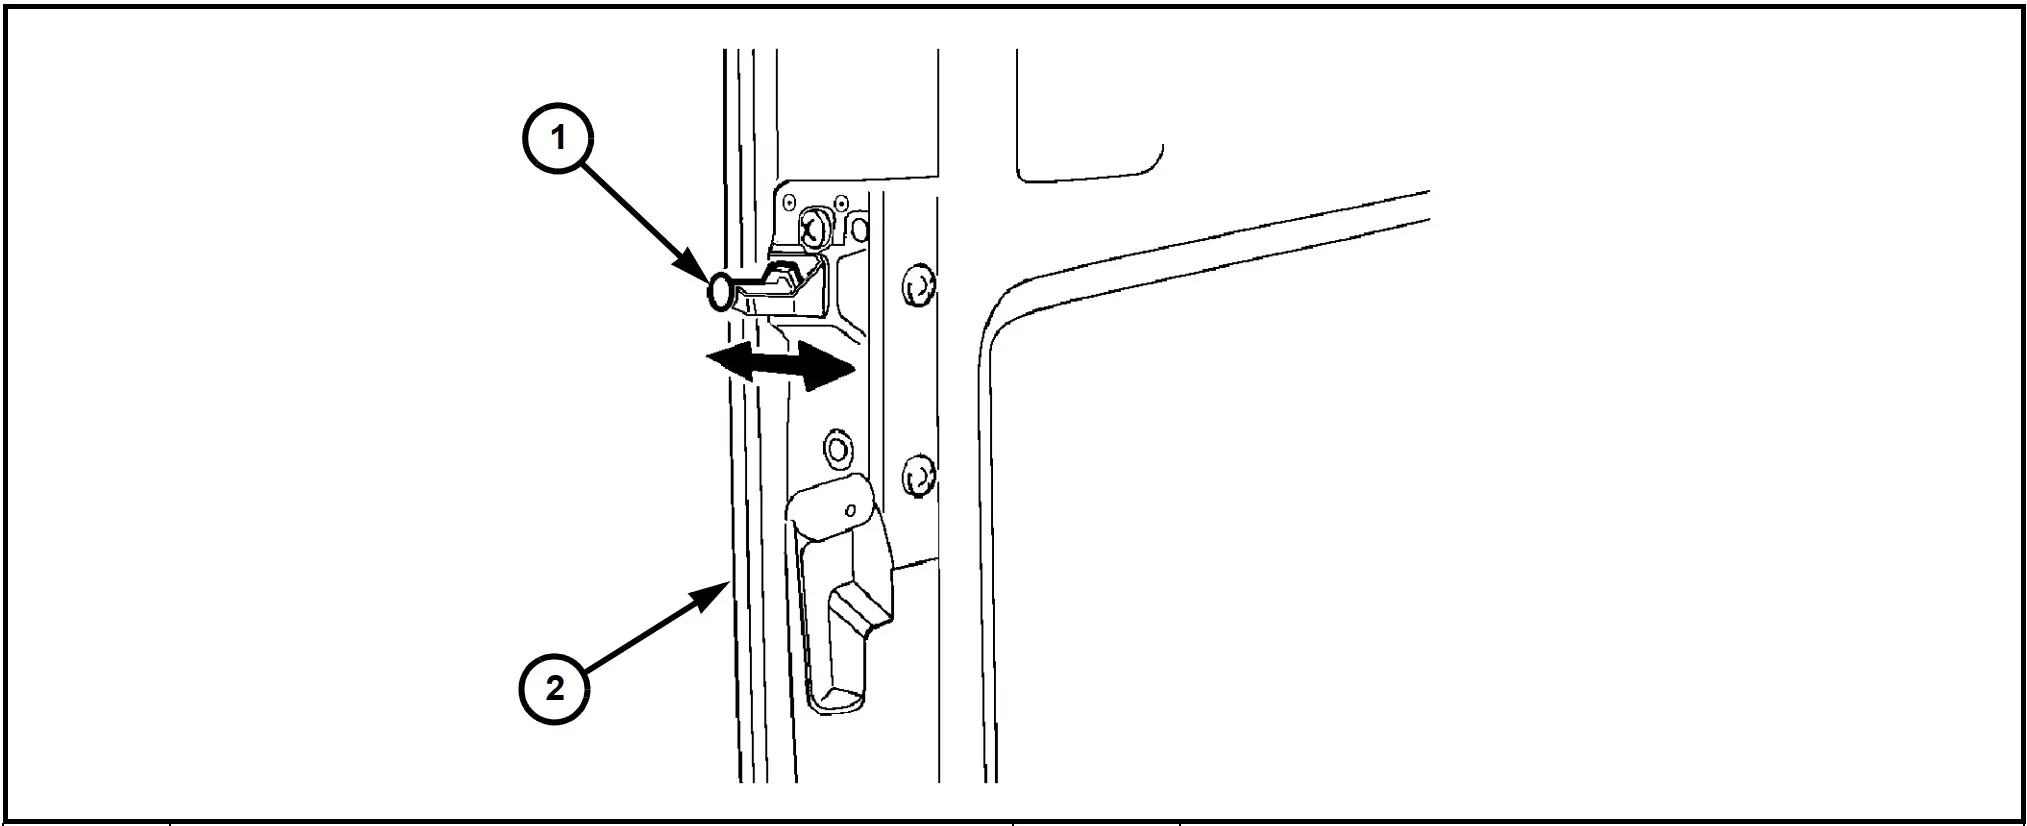
Loosen closing wedge bolts for adjustment
Loosen the closing wedge mounting bolts to allow the door to be repositioned. Do not remove completely.
Adjust rear ridge via center roller arm
The center roller arm controls the rear edge alignment. Adjust in small increments and re-check the gap.
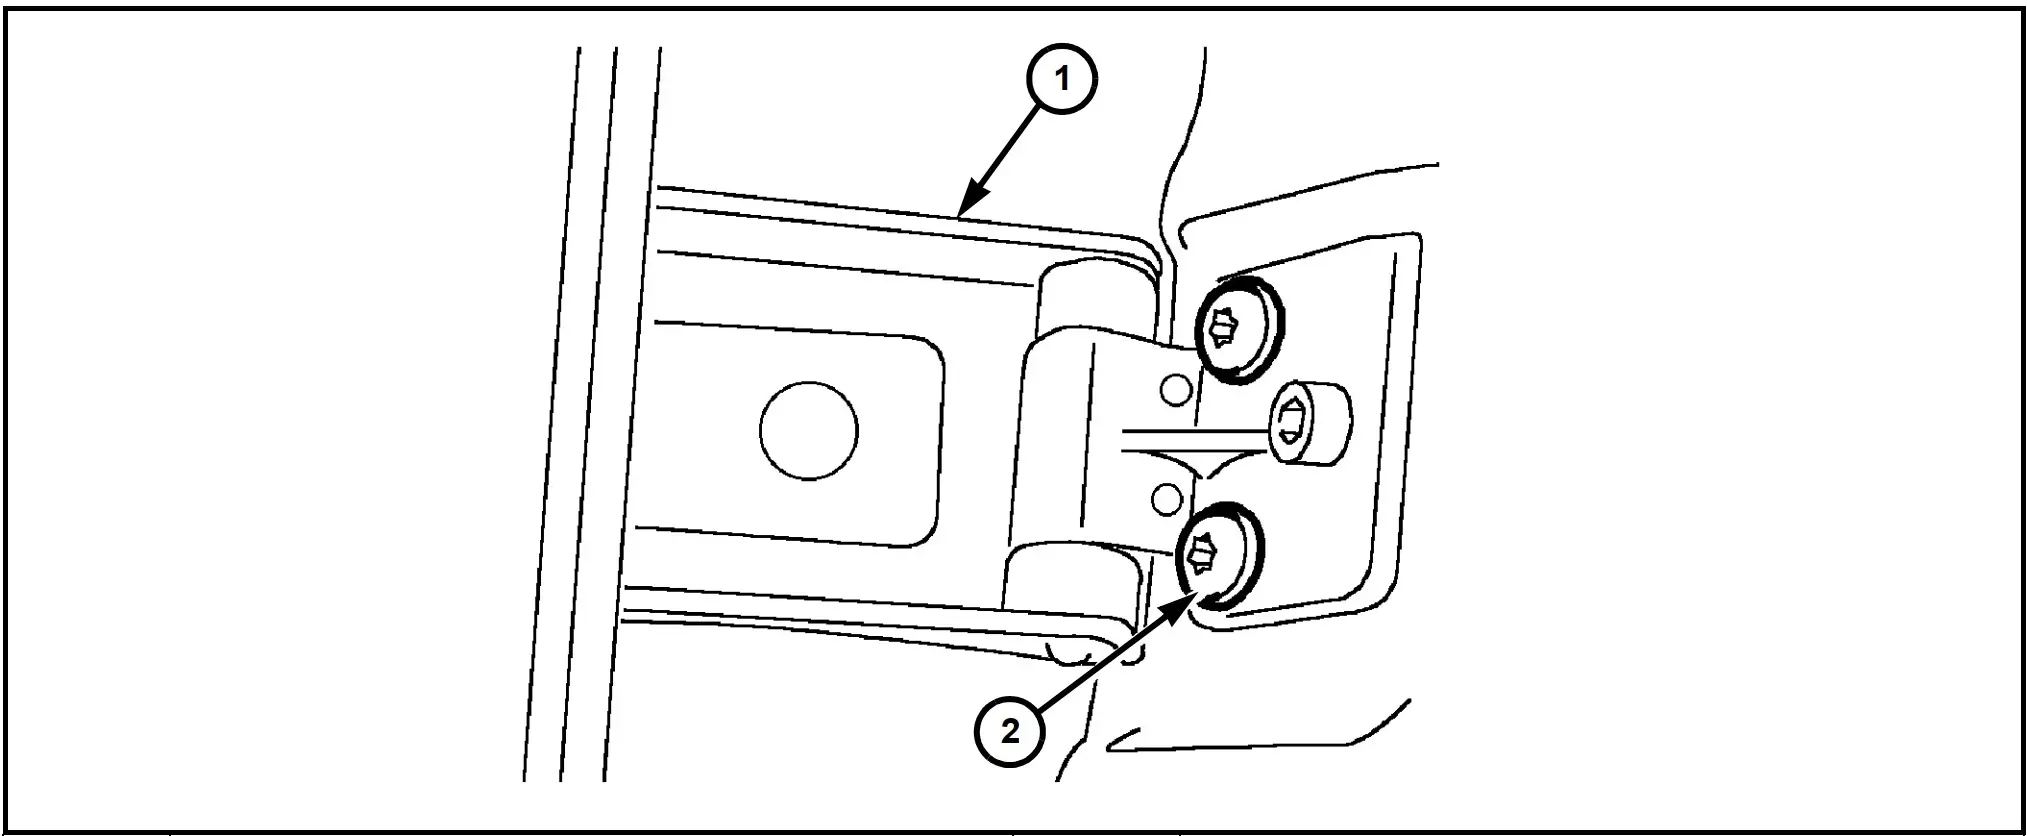
Adjust front ridge via upper/lower rollers
Upper and lower rollers control the front edge. Adjust both to maintain parallel alignment.
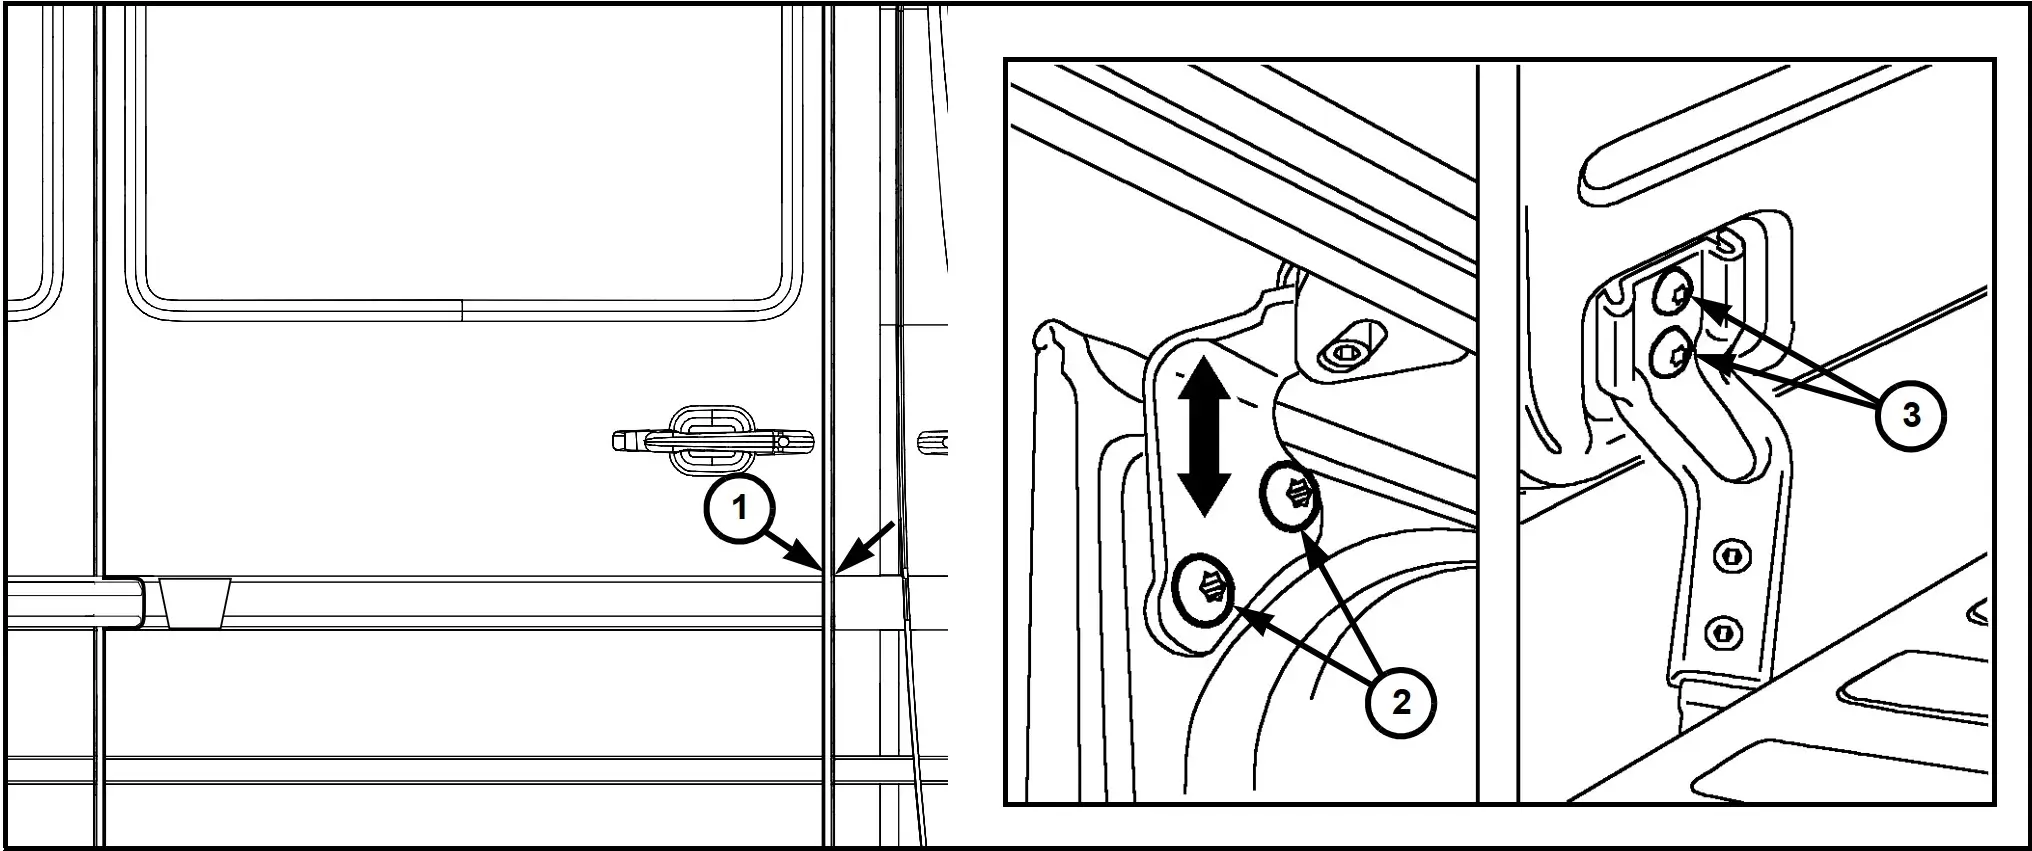
Tighten roller arm bolts to 18.4 ft·lbs
Once alignment is correct, torque all roller arm fasteners to spec. Recheck gap after tightening.
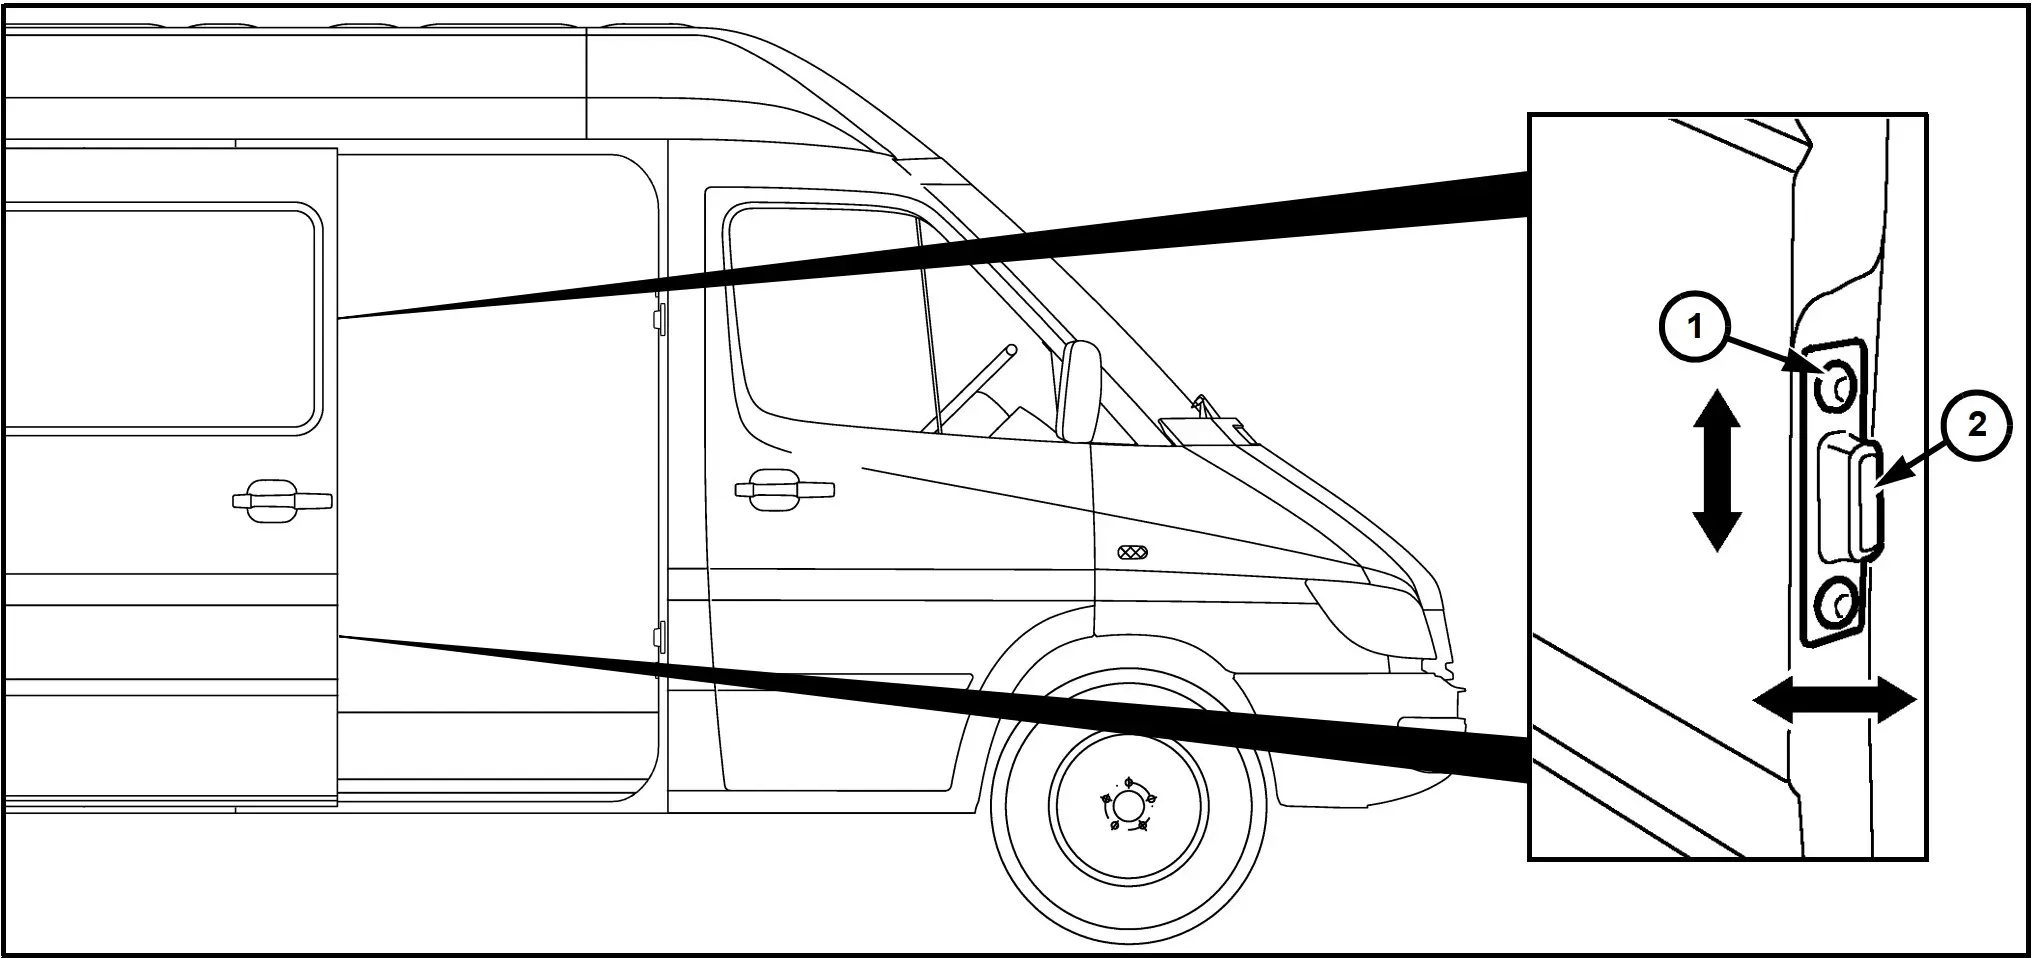
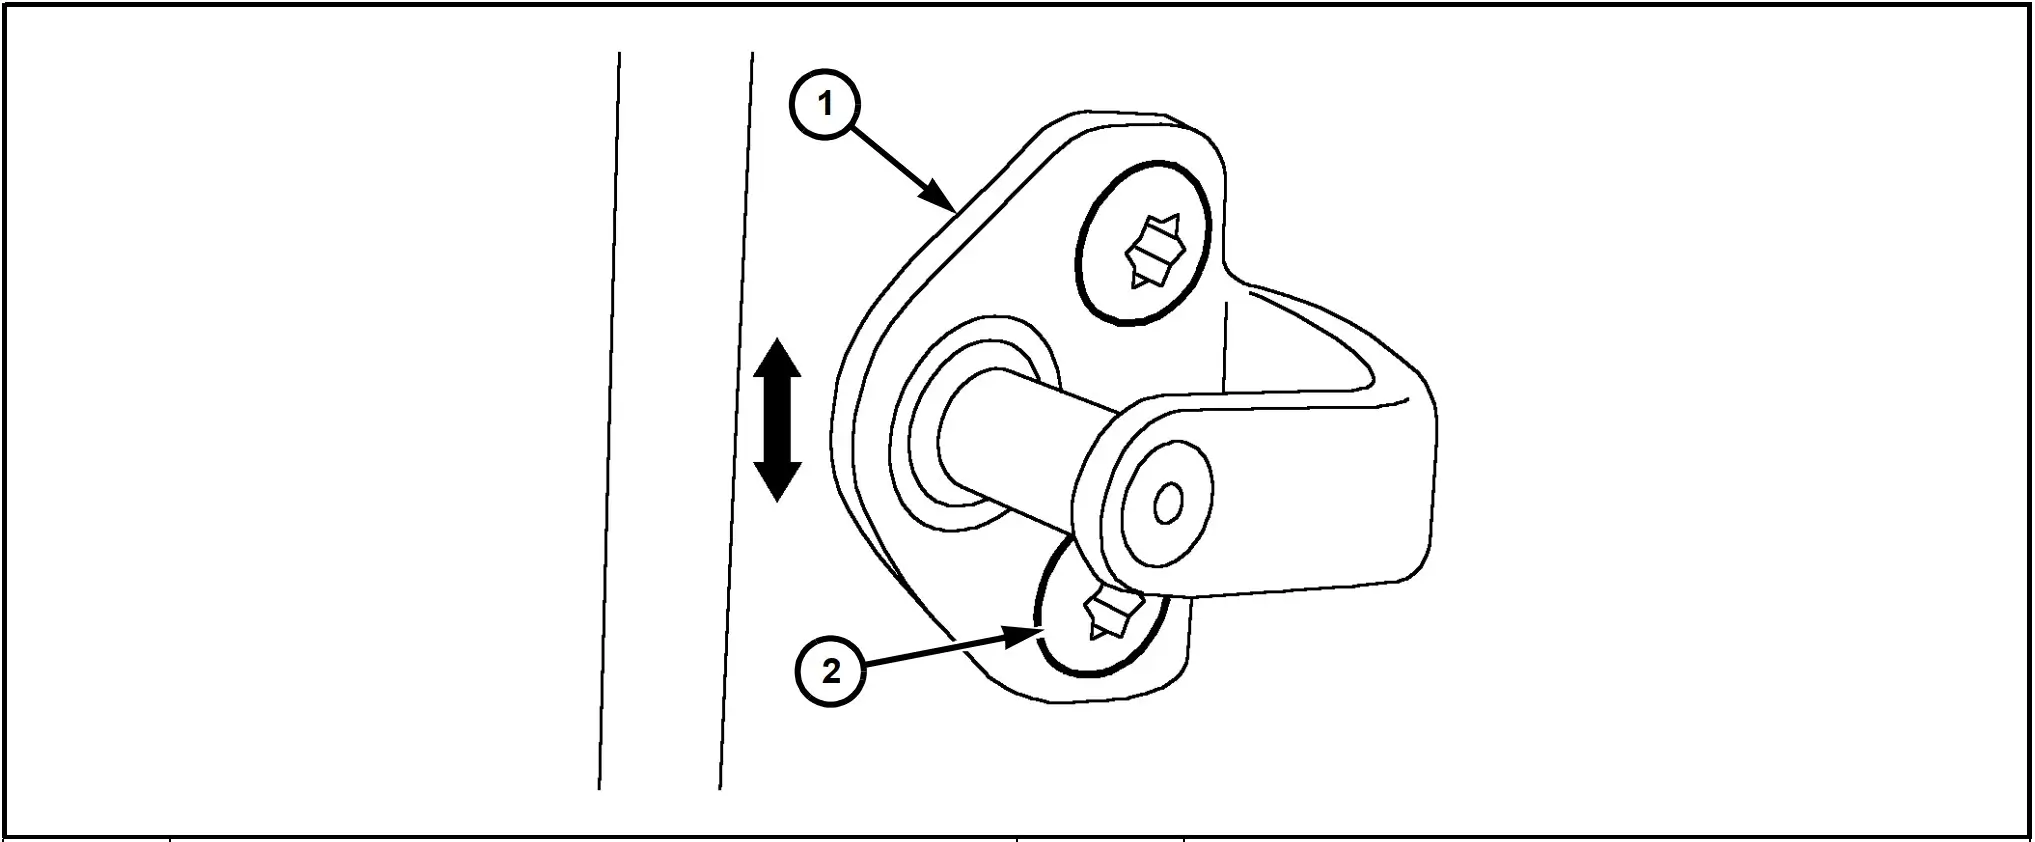
Adjust striker vertically, tighten to 18.4 ft·lbs
The striker controls how securely the door latches. Adjust vertically for proper engagement.
Rear Cargo Door Adjustment
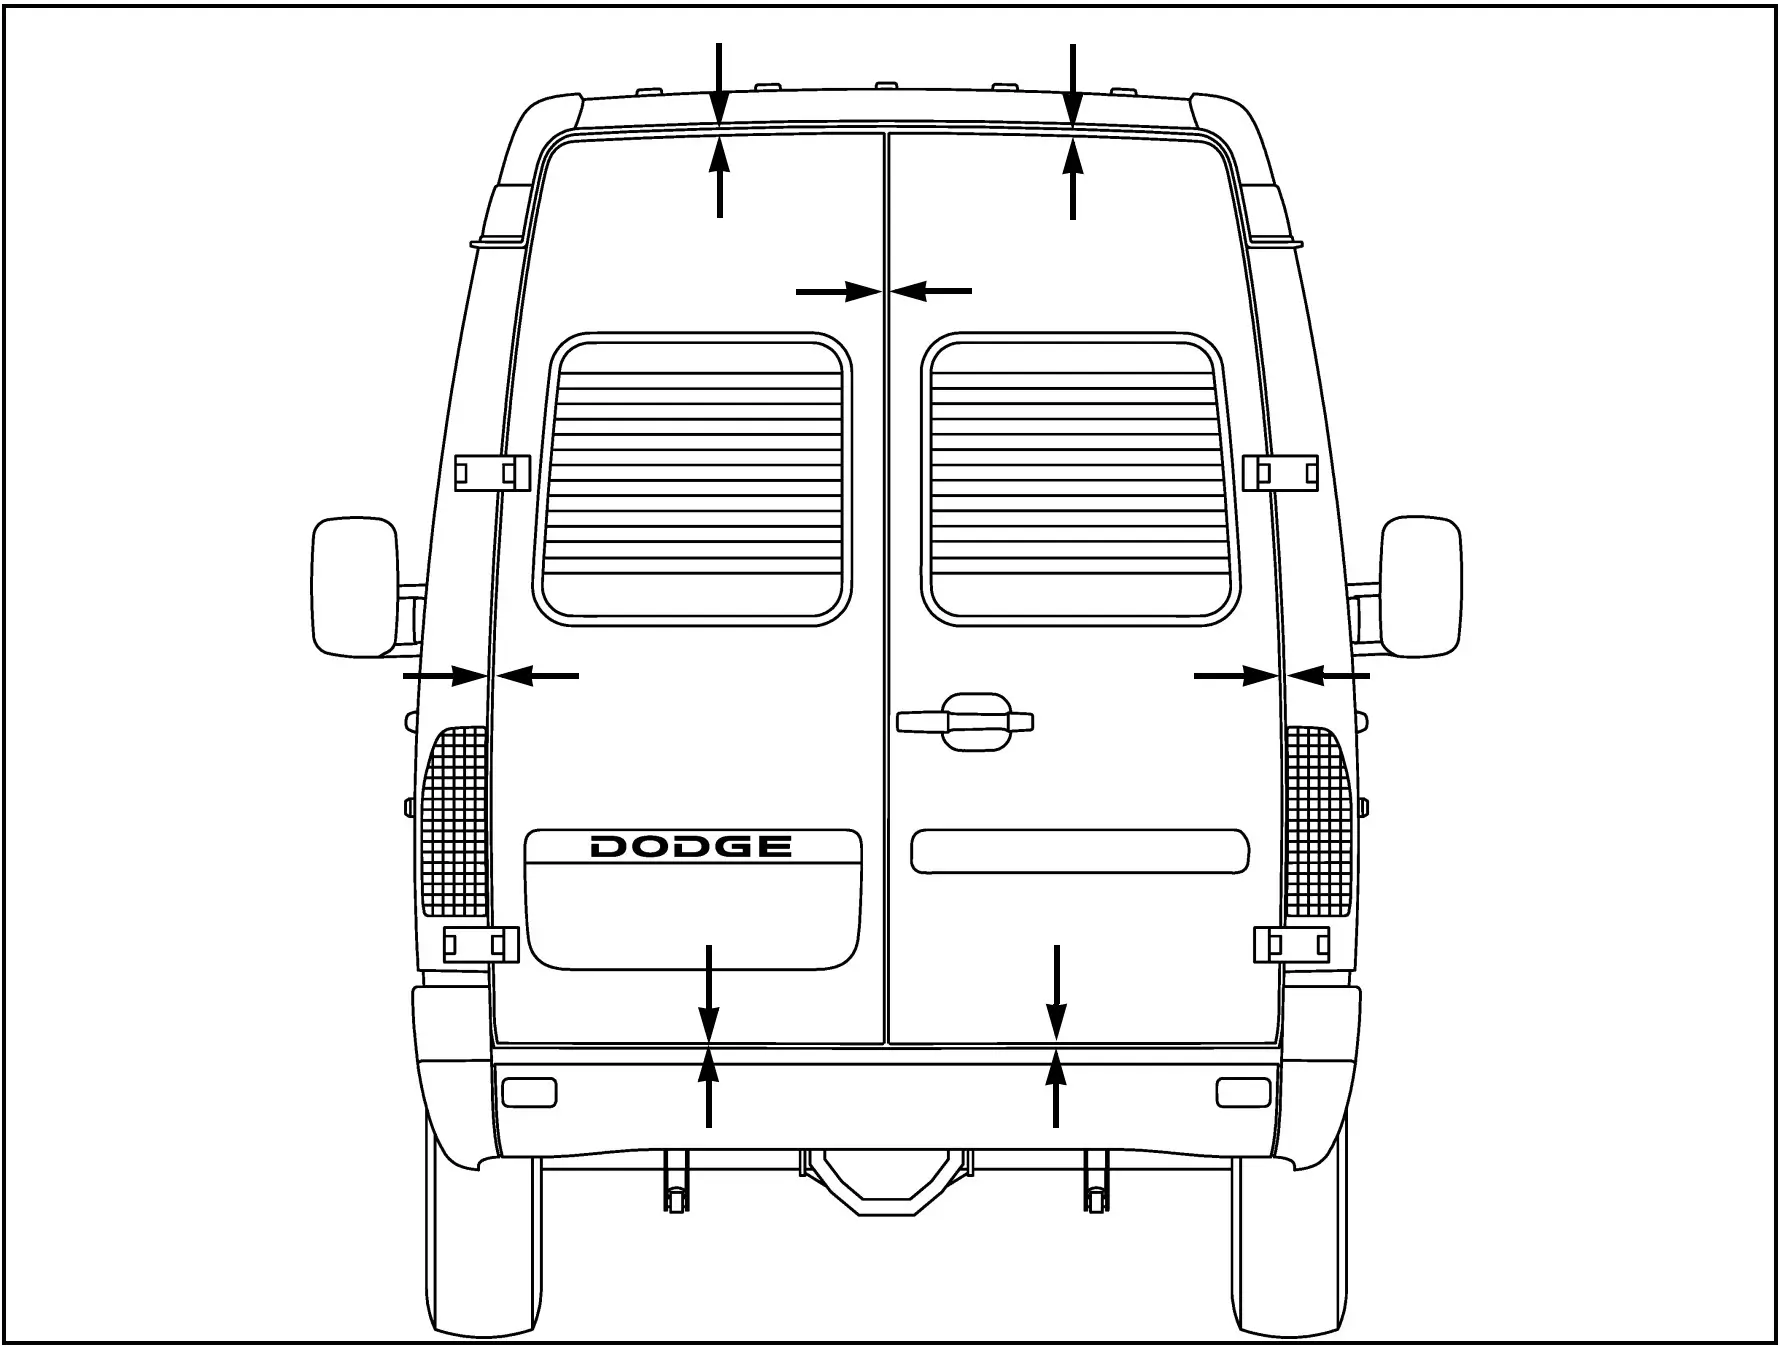
Perimeter gap: 0.31" ±0.02" (8 mm ±0.5). Top gap: 0.51" ±0.02" (13 mm ±0.5).
Check perimeter gap (0.31" ±0.02"; top 0.51" ±0.02")
Measure the gap around the entire door perimeter. The top gap is intentionally wider to account for seal compression.
Loosen hinge head bolts
Loosen the hex head bolts on the hinge mounting plate. Support the door to prevent it from dropping.
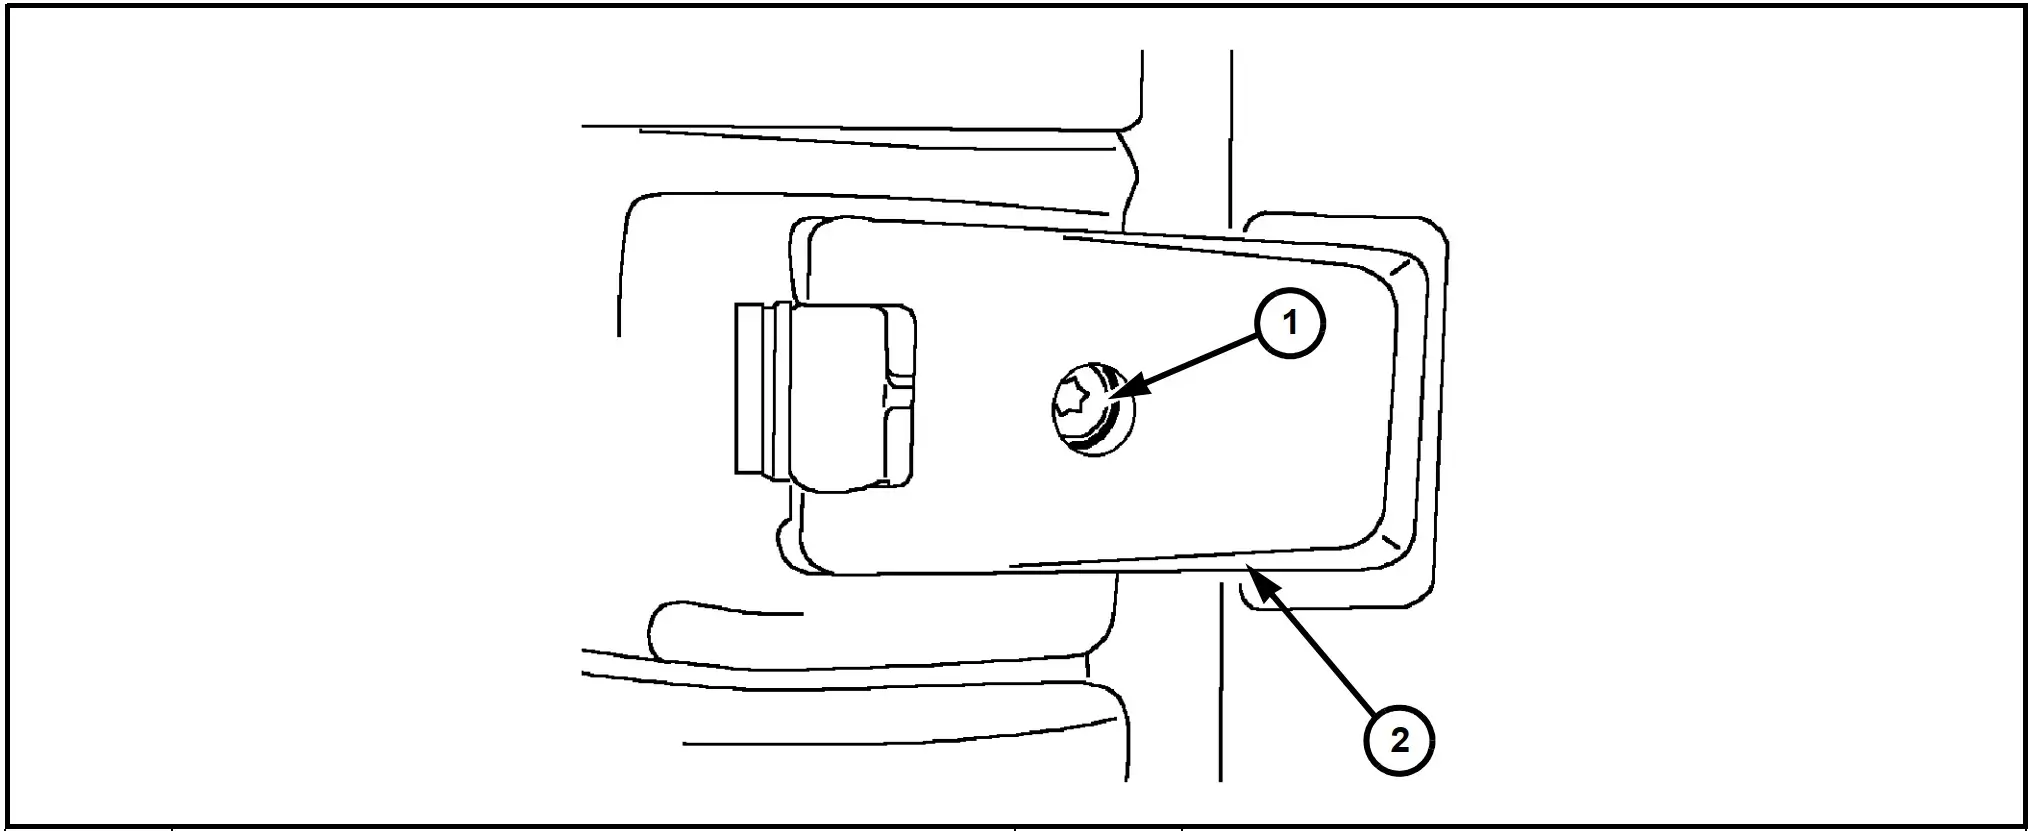
Adjust via socket-head bolt, tighten to 18.4 ft·lbs
Use the Torx socket-head bolt to fine-tune the door position. This controls in/out and up/down movement.
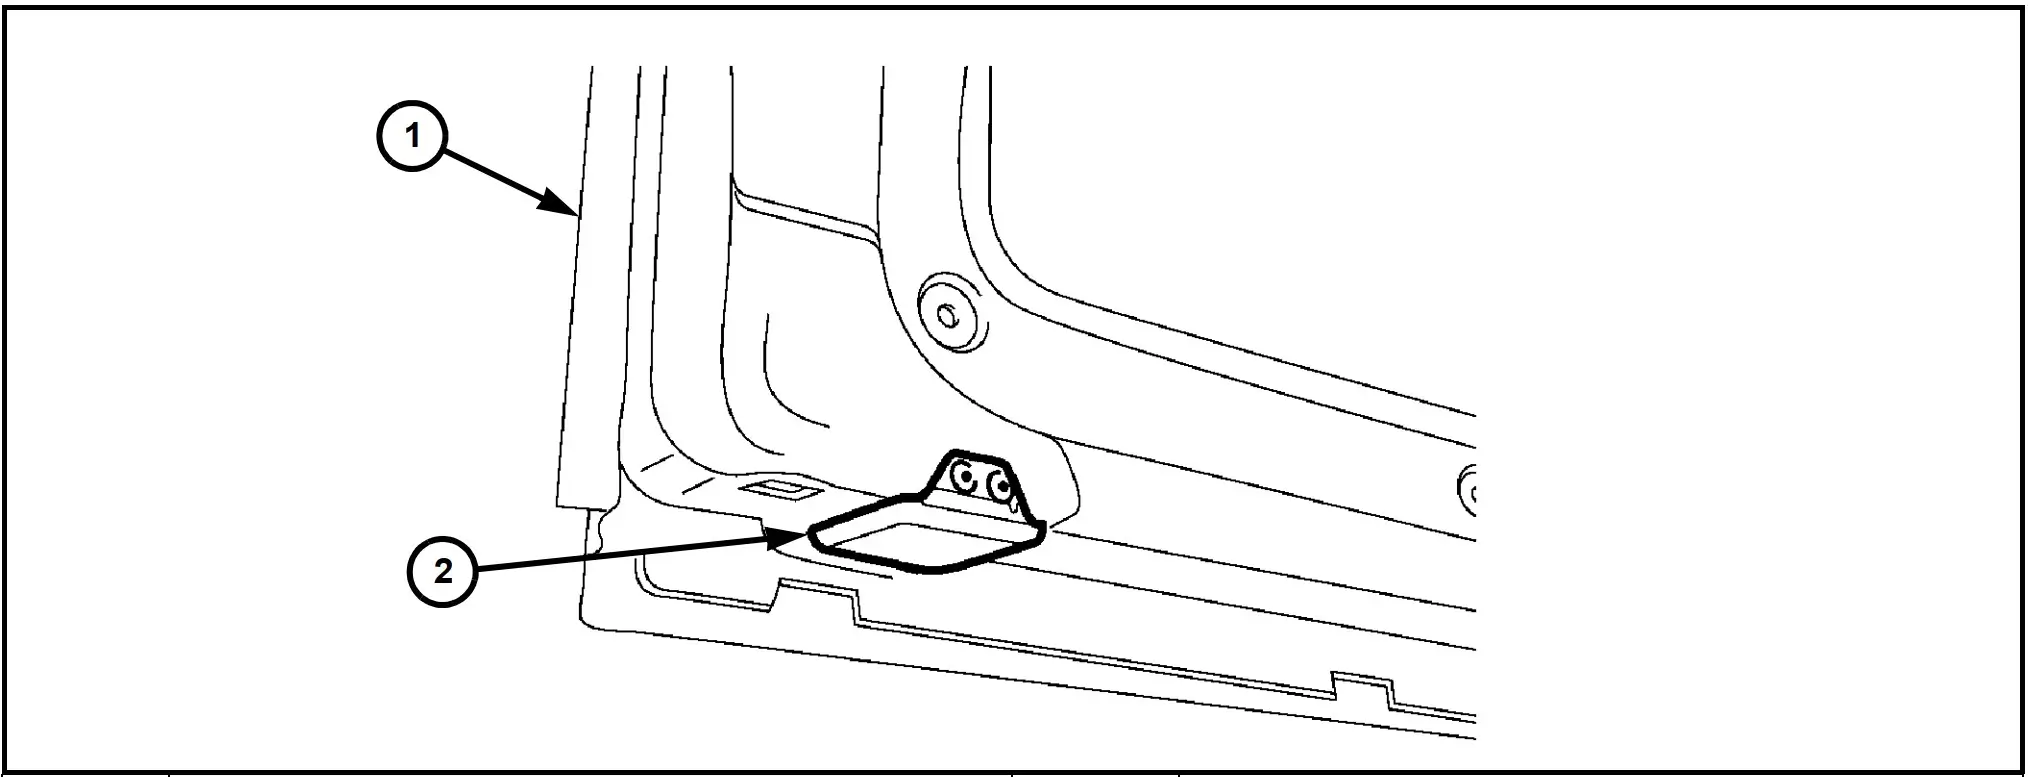
Align door edges with closing wedges
The closing wedges at the bottom guide the door into the correct position as it closes. Adjust for flush fit.
Adjust striker flushness horizontally
Move the striker horizontally so the door latches flush with the body. Test by closing the door firmly.
Door Maintenance Tips
Lubricate Regularly
Apply white lithium grease to the sliding door track, rollers, and striker every 6 months. Avoid WD-40, as it attracts dirt. Silicone spray works well for rubber door seals.
Inspect Rollers & Track
Check the upper, center, and lower rollers for flat spots or wear. Clean debris from the track. Worn rollers cause binding and uneven gaps that adjustment alone can't fix.
Check Door Seals
Inspect rubber seals for cracks, compression set, or detachment. Damaged seals cause wind noise and water leaks even with perfect gap alignment. Replace if deteriorated.
Winter Care
In cold/salt regions, rinse the track and lower rollers regularly to prevent corrosion. Apply corrosion inhibitor to hinge pivot points and exposed metal after adjustment.
Frequently Asked Questions
Still Having Door Issues?
Share photos and get advice from experienced T1N owners in the community.
Ask the Community